Automobiles Forum banner

Garage floor paint.

5K views 63 replies 23 participants last post by  cuatrokoop  
#1 ·
Alright ya'll

I am getting close to being able to paint my garage floor. I am probably 2 weeks away form that point hopefully. With that in mind I need to order the epoxy floor paint.

So before I do I thought I would ask you lot for any BTDT experience or opinions on the best products out there.

I am looking for a 2 part epoxy, single or multi coat. It must have a high gloss finish (Easier to clean up fluids) and an option to add slip resistant stuff in certain areas. This is usually done by sprinkling chips, or mixing in special sand.

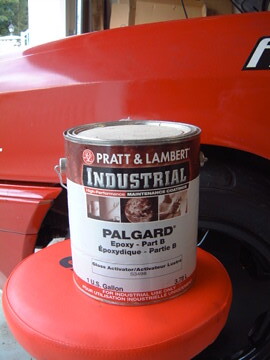
In my old shop I used this stuff from Home Depot

Image


On the plus side it was cheap, easy to apply in a single coat, very durable and looked good. Down side was that it was a bit thin, matt finish and hence harder to keep clean.

I have another couple of options I have looked into so far.

1. Muscle Gloss http://www.musclegloss.com/products.htm I know nothing about it other than what I read on this site. Looks nice though.

Image


2. A friend recently did his shop with 2 coats of epoxy and a clear urethane on top. Not sure of what product but I can find out
Image


I have a couple of good sources like this place which is local. http://epoxyproducts.com/ and they have some great recommendations and products.

So whats your opinion then, even if its just color. I am thinking red or gray floor (red makes it easy to see dropped black, gray or silver things)

H
 
#2 ·
My brother-in-law had that 1st option in his garage...it was good for a year or so and then started peeling. It is cheap to re-apply I guess.

I would also got for lighter color. red might be a bit too much on your eyes, especially if shiny.

That Mazda shop looks great!
 
#4 ·
I would suggest you give these guys a call

This is top quality stuff with great customer support.
I have used the armorpoxy II stuff at work and it is quality stuff.

http://www.armorpoxy.com/armo2.html

Also for a little more you could go with this stuff which I have also used.
http://www.racedeck.com/
The extra you spend on the decking you will more than make up in installation time.
It would be tough for me to decide to use anything else in a garage space.
I suppose it is susceptible to big hot metal parts melting through it but you would also damage painted floors as well.
With this stuff you just pop the damaged tile out and replace it with a new one.
 
#5 ·
I used the Rustoleum EpoxyShield like you and never had a problem (about three years now). I've heard of it peeling though and figure that those people didn't prep correctly before applying. EpoxyShield also have a gloss clearcoat now that you can put on after for that supergloss look.
 
#6 ·
Correct, most home-owner done jobs have bad results because they don't prep the surface well, or it was a sealed floor that they tried to coat. Bad prep, bad mix or a sealed floor are sure fire ways to have peeling epoxy paint, or paint that lifts on tires, bubbles with certain fluids, etc. When I had my garage floor poured, I made sure they didn't seal it so I could prep it and then epoxy coat it. I have the Rustoleum stuff to go on my floor...
 
#8 ·
I did the floor at my fisrt home and followed the instructions to the letter from the Home Depot kit. Acid etched the concrete to start, and I think that was the biggest key to getting it to last. I sold the house 4 years later, and it still looked great.

While prepping that house for re-sale, I decided to paint the basement floor with the same stuff, as it was previously painted red. I used red epoxy paint from the kit, but did not do much prep work. I got an offer in 4 days and was out in 30, but the floor did not seem to last very well. So what I am saying is that I'll confirm that the prep work is more importnat than anything else in the process.
 
#11 ·
I suspect the kit instructs the use of the acid etch, but including the acid my hinder distribution/ shipping due to the caustic classification. Basically it would increase the price and give us more to complain about.
 
#13 ·
Image


PLENTY of poor result info on the web about this product. Not all of the poor results are about poor preparation only.

What you need, is this:

Image


And I've made comments about it in the following links:

http://www.motorgeek.com/phpBB2/viewtopic.php?t=17612&highlight=garage+paint+dave

and here...
http://www.motorgeek.com/phpBB2/viewtopic.php?t=18534&highlight=garage+paint+dave

Plus the garage build thread with embarrassing photos here:
http://www.motorgeek.com/phpBB2/viewtopic.php?t=12666&highlight=garage+paint+dave

Another, slightly different post on AW
http://forums.audiworld.com/canada/msgs/135306.phtml

I did a lot of research before choosing the product we did, and it's holding up very well. Even welding on top of it hasn't done any damage.

A friend's 'build' using the same product...good photos:

http://miketanphotography.com/?p=196

-Dave
 
#15 ·
PxTx said:
I did the floor at my fisrt home and followed the instructions to the letter from the Home Depot kit. Acid etched the concrete to start, and I think that was the biggest key to getting it to last. I sold the house 4 years later, and it still looked great.

While prepping that house for re-sale, I decided to paint the basement floor with the same stuff, as it was previously painted red. I used red epoxy paint from the kit, but did not do much prep work. I got an offer in 4 days and was out in 30, but the floor did not seem to last very well. So what I am saying is that I'll confirm that the prep work is more importnat than anything else in the process.
Hey dude, my wife really wants to do this stuff to our garage, could you give me some pointers? maybe something they dont mention in the directions?
 
#16 ·
Follow the links I posted, my whole garage and Tanner's garage show the steps that are needed.

-Dave
 
#17 ·
One suggestion.
Our workshop back home is approx 4000 sqft and one design flaw we had which had to be corrected later on was the area under the hoists (that is if you are using hoists).
We used the first epoxy (the light grey one) and it worked well for a couple of years but the issue is that with employees (who do not care) you will get spanners and sockets dropping on the ground all the time.These will chip away @ the epoxy and eventually with time you will just be peeling off hardened layers of the stuff.

A solution which we did back in 2002? was under the hoist we had the cement/concrete diamond polished to a smoothe surface and then the perimeter of the hoist was expoxy coated.That way when a spanner fell or someone dragged an engine under the car (or something) the epoxy remained nice and new.Laundry detergent does wonders for cleaning up btw :)
 
#18 ·
OK so its time to order some epoxy (Wohooo, getting closer to being done) After a LOT more research and many phone calls I am still undecided (bugger). There is a lot of conflicting information out there!

here is my summary to date, if anyone has any more BDTD please feel free to chime in.

Assuming I am using a 2 part epoxy system, which I am.

Also assuming that the epoxy I want to use is a 100% solids system that is not solvent based., again this is the output of my research as being the only way to go.

Third assumption is that prep is the most important part of the process. Prep will be: A) Pressure wash, B) Degrease, C) (Optional) Sand floor to create key surface, D) Acid wash and rinse, E) Neutralise acid, F) Dry Floor.

Fourth assumption: Heat - Apparently the biggest problem with epoxy on concrete is air bubbles coming up out of the concrete. These are caused by a rise in temp of the slab while the epoxy cures (partly due to the heat form the epoxy curing. but mostly from ambient temp changes i.e. air cooling) Bottom line is that you want to heat the space, then either keep a constant temp, or better have the temp drop slowly over the cure time. That way any air in the slab will be contracting and sinking rather than expanding and rising.

With those assumptions made, there are 2 basic approaches as follows:

Option A) Single coat systems: Apply a single coat of an industrial grade epoxy floor. This could also be followed by a second coat of the same material if required, this should be done as soon as the first coat is dry enough to walk on.

Option B) Multi step system: Step1) Apply a primer of some sort, typically this is a thin solvent or water based 100% solids epoxy that is designed to soak into the concrete, create a good bond and seal the concrete. (This can be a thinned version of the main epoxy from the next step) Step 2) Apply single or multiple coats of the main epoxy. Step3) If desired, sprinkle color chips on main epoxy while still wet. Step 4) apply a urethane clear coat over the main epoxy. The clear serves 2 purposes, firstly it encapsulates color chips and secondly, it provides UV protection to the epoxy which tends to yellow over time when exposed to UV light.

Originally I was sold on Option B, however after the research it seems there is no reason to clear coat the epoxy assides from UV protection and some additional gloss value, and maybe, maybe some better chemical resistance. Having said that Armorpoxy have a clear epoxy top coat for higher gloss finish too. although they dont really recommend it, they recommend top coating with a solid color as its tougher.

Here is my conclusion to date:

I would like to primer the floor, it just makes sense.

Put down one coat of industrial epoxy and see how it looks.

Put down another coat if it needs it, throw on some color chips and anti slip where needed.

heres the problem though, if I want to add clear, it needs to be there when I am doing the main epoxy s it needs to be put on as soon as the prior coat is dry enough to walk on.

A bit more info for you all....

Re-coat time (time between coats) is anywhere from 6-12 hours assuming room temp curing.

Touch Dry time is usually about an hour

Walk on dry time is normally 6 to 12 hours.

Drive on time 24-72 hours.

90% cure is about 4 days.

100% cure approx 2 weeks. I.e. dont put anything REALLY HEAVY on the floor for a few weeks as it will make a dent and maybe stick.

This last point kind of screws up my plans :( I was hoping to start the epoxy process this coming weekend, and start the move of my shop over the long Thanksgiving weekend. Given I cant put anything heavy on the floor for 2 weeks I cannot really do the big stuff (Presses, Mill etc). Oh well....play it by ear I suppose.

So finally which product to choose? Options are as follows:

1) Single coat system with primer from Progressive Epoxy. This is a commercial grade product, available in light gray or light gray. Local to me so I can pick it up. Assuming 900sqft, single primer coat, single epoxy coat cost is about $600 for primer and topcoat (Clearcoat is an option) http://www.epoxyproducts.com/

2) Musclegloss: Similar system to option 1, primer and single coat epoxy. Available in a bunch of colors, ships to me. Cost is approx $800 for the primer and main epoxy, plus shipping. http://www.musclegloss.com/

3) Armopoxy2: Same process, Optional oil stop primer, then epoxy, then clear if desired. A medium range of colors available, ships to me. Cost for Primer is about $400, Cost for Epoxy is about $600 plus shipping.

So bottom line is $600 - 1000 for something without clear coat to do 900sqft of concrete. (Plus etching acid, seam sealer, rollers etc.

grrrr... confusing, gonna make some more calls. Oh and BTW, primer is also optional....
 
#19 ·
i am doing something a little different i think. i wanted to paint the floor, but i am getting a killer deal on some leftover laminate flooring. :D

dunno about welding on it though haha.
 
#20 ·
speeding-g60 said:
i am doing something a little different i think. i wanted to paint the floor, but i am getting a killer deal on some leftover laminate flooring. :D

dunno about welding on it though haha.
Hahahah thats awesome, I cant wait to see the pictures :)

Well I made a decision and here is the final result.

I decided to use the Armorclad product http://www.armorpoxy.com/mm5/merchant.m ... Code=ACLAD

No primer required apparently......

I spoke to a lot of people and the bottom line is this kit comes with the best quality epoxy, color flecks, non slip clear grit, clearcoat, acid, rollers and basically everything needed.

I am upgrading from the stock clearcoat to the military grade 2 part urethane clearcoat which is apparently much more durable and chemical resistant.

I opted to buy 2 complete master kits as my total floor area is almost 1000 sq feet so one kit plus the add on wouldnt cut it.

Pricey, but hopefully it is worth it. And actually it works out about the same as the other options I considered. Total investment for this will be about $1400

Full cure is one week. Driveable in 3 days after finishing the job. Epoxy coat needs 24 hour cure, then clearcoat needs 24 hours, then 3 days to drive on it, and 2 more until its hard....

Gonna order it tomorrow.
 
#22 ·
subvertdesign said:
sounds good... so what color did you decide on?
I finally ordered the stuff yesterday, had to wait for a few things to line up, namely my bank accounts!

So I cant tell you what color, youl'l have to wait and see, it should be cool though :)

The garage is coming along, more hurry up and wait at the mo as there are things that need to happen like expansion joint sealing that need to cure for 5 days before the epoxy goes down. Getting there slowly though.

I am hoping that the Epoxy goes down next week some time, form there it needs 7 days to cure before I can drive on it. IN that time I am hoping to wrap up some loose ends and get the Audi and shop ready to move, so maybe mid December move date......maybe (Ill believe it when it finally happens)

Who knows I might even get to give myself a Christmas present of a few days working on the Audi in my new shop!

I am planning a GTG for a 'Garage Warming' sometime once the things are moved. All those who are local and interested are as always welcome to come by for some free beer, food, welding, plasma cutting etc.... :) More info once its really done.
 
#23 ·
There's epoxy coating on mcmaster that i'm thinking about using if I get this house i'm looking at buying. The problem i was reading about some of the epoxy coating is that they need to be applied at over 50 degree temps. I plan on buying Krud Kutter's concrete cleaner and etcher, and then possibly the low temperature coating epoxy so I could get the car in the garage this winter with the low temperatures and epoxy coating on the floor. If it works out I might even do the basement of the house too. I'm thinking I'd like the light gray.

Low-Temperature Epoxy Coating- Please specify color: Semi-Gloss : Light Gray, White
Coating 2 gal. 2 hrs. 4 1/2 hrs. 444 @ 3 mils 200° F 20° to 120° F 7965T7 99.68
 
#24 ·
So its time to start updating this little thread again as I am now in the floor painting process.

I started the prep work for the floor finally, and man is it fun :bashtard:

Given the cost of the epoxy and the fact that I am a perfectionist, I decided I didn't want to risk any kind of adhesion failure. With this in mind I decided to surface grind the floor to ensure no prior sealers remain.

Step 1: Empty the garage out.

Step 2: Rent a surface grinder. I rented this from Taylor Rental over night (5pm to 9am). Cost for the grinder was $70 overnight, or $90 for 24 hours.
Image


Step 2: Install the grinding stones ($24 a set). These are held into the machine with wooden wedges, very high tech. Then try them out, find out they don't even scratch the floor despite the rental shop insisting they would work. Pull out the stones and discard angrily, then install the diamond cutters ($54 a set), but they do at least work.
Image

Image


Step 3: Start grinding the floor at 6pm. I started in the store room just in case I screwed it up. This process worked pretty well, although it is really SLOOOOOW. Here are some in progress, before and after shots.
Image

Image

Image

Image


I worked until about 2am and was about 3/4 done, took a shower and went to bed. Got up again at 5:30 and finished the job by 8am in time to return the machine.

Some things to note:

A) This is a such ass job.
B) The diamond grinder removed about a total of 1/64" maybe, this equates to a pile of concrete dust about 6'x6'x6" deep! Or if you prefer, 3 trash bags filled with dust to the point I can only just lift them.
C) This job SUCKS ASS!
D) Dont drink Red Bull before doing this job, you want to go fast but have to go REALLY slowly, like maybe 1' per minute by the time you have done 4 passes.
E) Earplugs & dust masks required.

Heres an action shot
Image


And a video of the slow progress for those who need more convincing this is a horrid job (Yes worse than taping and setting I think)

http://gallery.mac.com/haydntaylor#1004 ... olor=black

So that is concrete grinding. Tonight I get to sweep 3 times, vacuum, blow it down with air, then pressure wash it to degrease the place, then steam clean it just because I can. The last step before epoxy is to acid wash and then let it dry out fully.

I am hoping to get the epoxy down over this coming new years long weekend, but that all depends on whether the water dries out of the floor in time.